
Eden Prairie Wood Flooring has been doing hardwood floor refinishing in Eden Prairie, MN for 20+ years, serving surrounding cities including Chanhassen, Shakopee, Edina, Minnetonka and Hopkins. We take worn, scratched, water-stained and dated floors back to bare wood and rebuild the finish on them, on solid site-finished floors above grade and on engineered floors whose wear layer can carry it.
Refinishing is the one service where the quality of the result is decided almost entirely by work you cannot see afterward. The grit progression, how flat the edges are cut into the field, whether the buffer pass removed the previous scratch pattern, how clean the floor was when the first coat went on. A floor that was sanded badly and finished beautifully still shows every shortcut the moment the light comes across it in the afternoon.
So the quote carries the sequence in writing: which grits, in what order, what happens at the edges and under the toe kicks, the finish and the number of coats, and the dry and cure times with a note about what a cold Minnesota house in January does to them. That way the work can be checked against a document rather than against a memory of what somebody said on the doorstep.
What a Full Sand-and-Refinish Involves
The Thirty-Six, Fifty and Eighty Grit Sequence
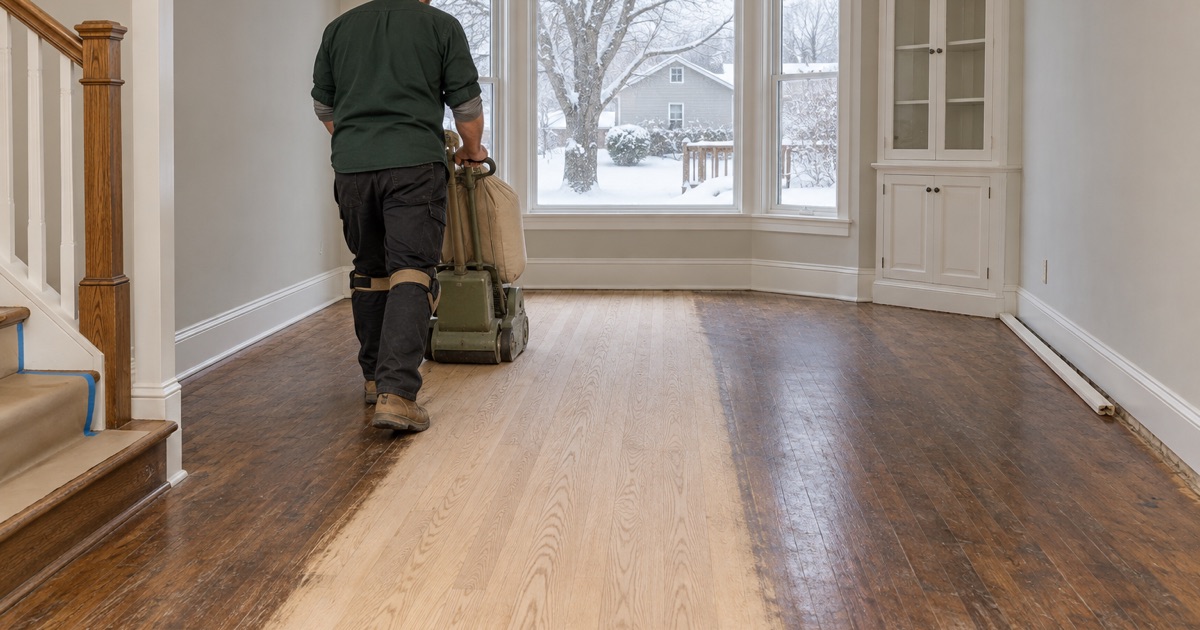
A full sand is a progression, not a single pass. A coarse abrasive around thirty-six grit removes the old finish and levels the field, fifty takes out the scratch the coarse paper left, and eighty leaves a surface even enough for the finish to sit on without telegraphing what came before. Skipping a step hides the coarse scratch under the coating, where afternoon light finds it later. The sequence goes on the quote so it can be checked.
Drum Sander, Edger and Buffer Work
The drum sander does the open field, the edger reaches what the drum cannot, and the buffer or orbital blends the two so the perimeter does not read as a darker band around the room. Most visibly poor refinishing jobs fail at that junction rather than in the middle of the floor. We cut the edges to the same grit progression as the field and blend with an abrasive screen before any finish is mixed.
Sanding Defects: Chatter, Drum and Swirl Marks
Chatter marks are regular ripples from a machine out of adjustment, drum marks are the dish left where a machine paused, and swirl marks come from buffer or orbital work at the wrong grit. All three are invisible on raw wood and obvious under a coat of finish. We check the sanded floor under raking light before finishing, because the only cure once a floor is coated is to sand it again.
Choosing Stain and Sheen
Testing Color on Your Own Floor
A stain sample on a showroom board tells you what that board looks like. We sand a test area on your floor and lay the candidate colors on it, then look at them in daylight and under the lighting you actually live with. Wood species, board grade and how much the existing floor has ambered all move the result, and none of that is visible on a sample card.
Red Oak, White Oak and Hard Maple Take Stain Differently
Red oak carries pink undertones, white oak runs browner and cooler, and hard maple is dense and closed-grained enough that stain can blotch on it without a conditioner and a careful sequence. Hickory and American walnut bring their own color variation from board to board. We identify the species before recommending a color and say plainly when a species is going to fight the color you have in mind.
Sheen Level and How a Floor Shows Wear
Sheen is not only a look. A higher gloss reflects more light and therefore shows dust, pet traffic and every small scratch more readily, while a matte or satin surface hides day-to-day wear and reads quieter in a big open room. We talk through sheen against the room’s light and the household’s traffic, and we keep the chosen sheen on the paperwork so a later recoat can match it.
Finishes and Cure Times
Waterborne Polyurethane
Waterborne finishes cure quickly, carry low odor and stay close to the raw color of the wood, which suits white oak and hard maple floors where amber would be unwelcome. Fast recoat windows mean the coats can go on close together and the house comes back sooner. They are the usual answer where a household needs the floor back in service without a long displacement.
Oil-Modified Polyurethane and Hardwax Oil
Oil-modified polyurethane brings warmth and ambers further over the years, which many people want on red oak, and it needs longer between coats and before furniture returns. Hardwax oil penetrates rather than forming a film, giving a low-sheen surface that can be spot-repaired in place instead of fully recoated, at the price of a maintenance routine. We explain the trade-offs rather than defaulting to whatever is in the van.
Cure Time Against Dry Time in a Cold House
Dry time is when a finish stops being tacky. Cure time is when it has reached its final hardness and can take rugs, furniture pads and pet claws. They are different numbers, and a cold house with the thermostat set back extends both. We give each in writing for the specific product, along with when to walk in socks, when to move furniture back and when to put rugs down.
Living Through a Refinish
Dust Containment and What It Misses
Vacuum-shrouded machines capture most of the dust where it is made, and we add sealed openings and containment at the room boundary. What escapes is fine, light and will settle on horizontal surfaces for a day or so afterward. We say that up front, because a customer told to expect no dust at all is disappointed by an objectively good result.
Furniture, Pets and Where the Household Sleeps
Before the first machine runs we agree what gets moved and by whom, where the household sleeps on coating nights, and how pets are kept off the floor through the cure. Claw marks in a curing finish are permanent, and so is a rug put back down too early. Planning it beforehand turns the disruption into a schedule instead of a series of surprises.
Floors That Should Not Be Sanded Yet
Some floors are not candidates. A floor still taking on moisture from a leak or a slab, one with widespread cupping that has not yet relaxed, an engineered floor with a wear layer too thin to survive a drum, or a floor where structural subfloor work is due first. We say so and sequence the other work ahead of the refinish, because sanding a floor that is going to move is money spent twice.
Our Step-by-Step Hardwood Floor Refinishing Process
Assessment and Moisture Readings
We check the floor’s remaining thickness, identify the species and existing finish, meter the boards and subfloor, and read the indoor relative humidity. Anything that would make a sand premature is flagged here rather than discovered with a machine in the room.
The Written Quote and Schedule
The quote names the grit sequence, the edge and blend method, the stain if any, the finish and coat count, and the dry and cure times. Alongside it goes a day-by-day schedule of which rooms are out of use, so the household can plan around real dates.
Sanding, Test Area and Finishing
The floor is sanded through the sequence with containment running, the stain test area is approved before any color goes down across the field, and the finish is applied in the agreed number of coats with the sheen recorded.
Cure, Return to Service and Aftercare
We hand over when to walk on the floor, when furniture returns, when rugs can go down and how to maintain the finish, with the product and sheen written down so a future recoat can match what is already there.
- 20+ Years Experience
- Free Written Quotes
- Moisture Readings on Every Quote